Free Home Delivery Across India!
How Custom Acrylic Nameplates Are Made: A Look Inside Our Process
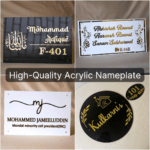
The Ultimate Guide to Custom Acrylic Nameplates: From Idea to Your Doorstep
Ever wonder how a simple idea becomes a stunning, high-quality nameplate? In the world of modern decor and branding, acrylic is the star material. It’s a choice that delivers “smart luxury”—a premium look without the high cost and drawbacks of traditional materials like glass or metal.
This guide will walk you through the entire journey, step by step, so you can understand the craftsmanship behind the final product. Let’s dive in!
So, What Makes Acrylic So Special? ✨
At its core, acrylic is a high-grade, durable plastic scientifically known as PMMA. You might know it by brand names like Plexiglas® or Lucite®. It’s famous for its incredible clarity and strength. For nameplates, we typically use two types:
- Cast Acrylic: Perfect for engraving. When a laser touches it, it creates a beautiful, frosted white text that really pops. It’s also super tough and great for outdoor use.
- Extruded Acrylic: The champion of cutting. A laser cuts through it to create a perfectly smooth, flame-polished edge that looks just like glass.
Here’s why acrylic is the go-to choice for modern nameplates:
- 💎 Looks Like Glass, But Better: It’s clearer than glass, letting through up to 92% of light. This makes colors look incredibly vibrant and text super sharp.
- 💪 Amazingly Strong & Safe: Acrylic is up to 30 times more impact-resistant than glass. It won’t shatter into dangerous shards, making it a safer choice for offices and homes.
- 🍃 Light as a Feather: It’s about 50% lighter than glass. This means we can often mount it with strong double-sided tape—no drills, no fuss, and lower shipping costs!
- ☀️ Weatherproof Wonder: Acrylic is naturally UV-resistant, so it won’t turn yellow in the sun. It also repels moisture, making it perfect for both indoor and outdoor signs.
- 🧼 Easy to Clean: A simple wipe with a soft cloth and soapy water is all it takes to keep it looking brand new.
Step-by-Step: Your Nameplate’s Journey
Creating your perfect nameplate is a seamless process that blends a client’s vision with precision technology. Here’s how it’s done.
Part 1: The Design Phase 🎨
Step 1: The Idea & Consultation It all starts with a conversation. A client shares what they need—a desk plate, a door sign, or a house number—and the style they’re going for. Names, titles, and logos are discussed to capture the vision perfectly.
Step 2: Choosing the Right Thickness The thickness of the acrylic sets the tone for your nameplate.
- 3 mm (1/8″): The most popular choice. It’s the perfect balance of sturdy and sleek for most desk and door nameplates.
- 5-6 mm (~1/4″): Adds a more premium, substantial feel. Great for larger wall signs that need to make a statement.
- 8-12 mm (3/8″ – 1/2″): The high-end option. Ideal for creating solid, freestanding desk blocks or prestigious awards.
As a pro-tip: If you’re looking for a classic, can’t-go-wrong combination, a 6mm base with 3mm mirror acrylic for the lettering is the safest and most loved option to begin with. It creates a beautiful 3D effect with a premium feel.
Step 3: The Digital Blueprint & Final Approval To create the design, professionals use software like CorelDRAW. For those just starting out, using a CorelDRAW monthly subscription is a great way to begin without a large upfront investment. Once the design is complete, a digital proof is created. This blueprint, showing exactly what the final product will look like, is then sent to the client via WhatsApp or email for final approval. This step is crucial because it ensures everything—from spelling to layout—is 100% correct before any material is cut.
Part 2: The Magic of Making 🛠️
Step 4: Prepping the Acrylic (The “Gumming” Trick) For nameplates with layered letters, a clever technique is used. Before cutting, a sheet of high-performance double-sided adhesive is applied to the back of the acrylic sheet. This means every single letter cut will have a perfect, ready-to-stick backing. No messy glue, ever! For this process, brands like Sunsui and 3M are very popular choices.
Step 5: The Laser Does Its Work This is where the magic happens. The design file is sent to a CNC laser machine.
- For Cutting: A high-power laser beam melts through the acrylic, following the design’s outline to create perfectly clean, polished edges.
- For Engraving: A lower-power beam moves quickly across the surface, etching the text or logo with pinpoint precision.
Getting this perfect result isn’t a one-size-fits-all process. Different power and speed settings are needed for different acrylic thicknesses. A thicker sheet, for example, requires more power or a slower speed to cut through cleanly. That’s why it’s a golden rule to always test the settings on a small scrap piece of acrylic first. This quick check guarantees a flawless result on the final nameplate.
Step 6: Assembling the Pieces Thanks to the “gumming” trick in Step 4, assembly is a clean and simple “peel and stick” process. To ensure the letters are aligned with perfect precision, a stencil is often created, or very light markings or engravings are added to the base. This acts as a foolproof guide. Each laser-cut letter is then carefully placed into its designated spot. The bond is incredibly strong and the finish is flawless.
Part 3: The Final Stretch 📦
Step 7: Protection and Packaging Once the nameplate is assembled, it gets a final quality check. Then, it’s wrapped securely in a generous layer of bubble wrap. For bigger nameplates, custom-fit thermocol sheets are also used to provide extra rigid support and protection against impacts. Finally, it’s all placed in a sturdy cardboard box for maximum safety.
Step 8: Shipping The last step is sending the securely packaged nameplate on its way using reliable shipping partners to ensure it arrives safely. In our experience, Delhivery One is a great option for starting out.
Your Vision, Brought to Life by Qalb Acrylic
From a simple idea to a finished product, creating a custom acrylic nameplate is a process of partnership and precision. At Qalb Acrylic, we are dedicated to this craft, making bespoke, professional-grade signage accessible to everyone.
We hope this guide has given you a clear picture of the care and technology that goes into every piece we create. If you’re inspired and ready to take the next step:
- Explore Our Designs: Visit our online gallery to see a wide range of fully customized acrylic nameplates.
- Visit Our Website: Discover all our products and services at www.qalbacrylic.in.
- Contact Us Directly: Have a question or a unique idea? Call or WhatsApp us at +91 85917 47642.
Let our team at Qalb Acrylic turn your vision into a stunning reality!